
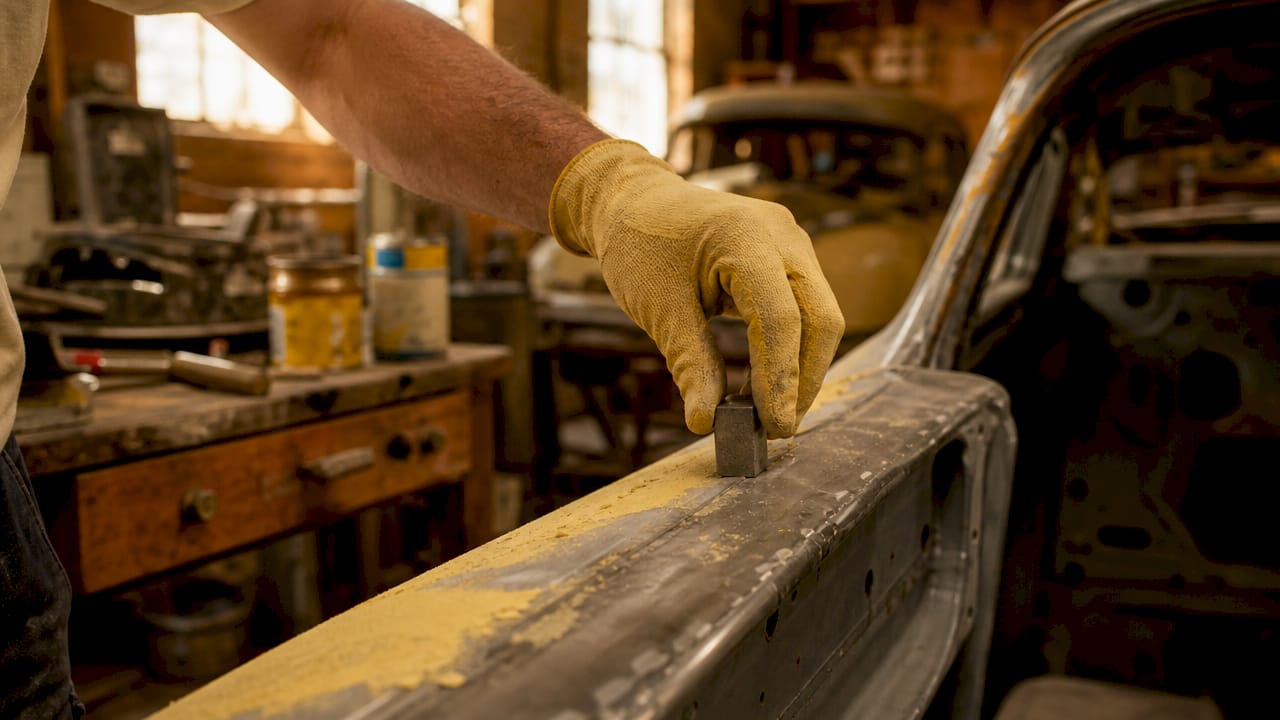
Lead bodywork, known in the trade as lead loading or body soldering, is the traditional method of finishing seams, joints, and body lines on vintage cars using a lead-tin alloy solder composed of roughly 70% lead and 30% tin. The role of lead bodywork in vintage cars goes far beyond cosmetics. It defines authenticity, long-term durability, and the standard by which serious collectors and show judges measure a restoration. Modern polyester fillers are faster and cheaper, but they cannot replicate what lead delivers on a 1957 Chevrolet Bel Air roof seam or a 1965 Ford Mustang pillar joint. If you are serious about restoring a classic car to factory-correct standards, understanding lead loading is non-negotiable.
Why lead bodywork still matters for classic car restoration
Lead bodywork maintains historical authenticity and durability better than plastic filler on classic cars originally finished with lead seams. That is not a preference. It is a fact that affects resale value, show scoring, and long-term structural integrity.
The core advantage of lead over polyester filler comes down to physics. Lead repairs expand and contract at a rate similar to steel, which means the bond stays stable through decades of temperature swings. Polyester fillers shrink and crack over time, especially in high-stress areas like door pillars and roof seams. A filler repair that looks perfect at the show in june can show hairline cracks by the following spring.
Lead also bonds metal to metal. It does not sit on top of the surface the way plastic filler does. That difference matters enormously in areas that flex or vibrate during driving. A lead-filled seam on a 1969 Camaro quarter panel will outlast a filler repair by years, sometimes decades.
The importance of lead in vintage cars is also financial. Collectors and auction houses like Barrett-Jackson and Mecum Auctions recognize period-correct lead work as a quality indicator. A car with documented lead bodywork commands stronger bids than one with visible filler repairs. When you evaluate bodywork condition before buying a classic, lead seams versus filler seams is one of the first things an experienced eye checks.
- Lead bonds directly to bare steel, creating a metal-to-metal connection
- Lead expands and contracts with the body panels, preventing long-term cracking
- Lead is waterproof, unlike polyester fillers that absorb moisture under paint
- Lead-finished cars score higher at concours and AACA-judged events
- Lead is the factory-correct material for most American and European classics built before the 1980s
Pro Tip: Before committing to any restoration, probe suspect seams with a magnet. Lead is not magnetic. If the magnet sticks to a filled seam, filler is present and the area needs assessment for moisture damage underneath.
What does the lead loading process actually involve?
Lead loading is a finishing technique, not a structural repair. You cannot use it to fill large gaps or replace rusted panels. The metal underneath must be solid, straight, and properly prepared before lead goes anywhere near it.
The process demands patience and a steady hand. Lead loading typically requires 7 or more hours for a single complex panel section like rear pillars or roof dents. That time investment reflects the craftsmanship involved, not inefficiency.
-
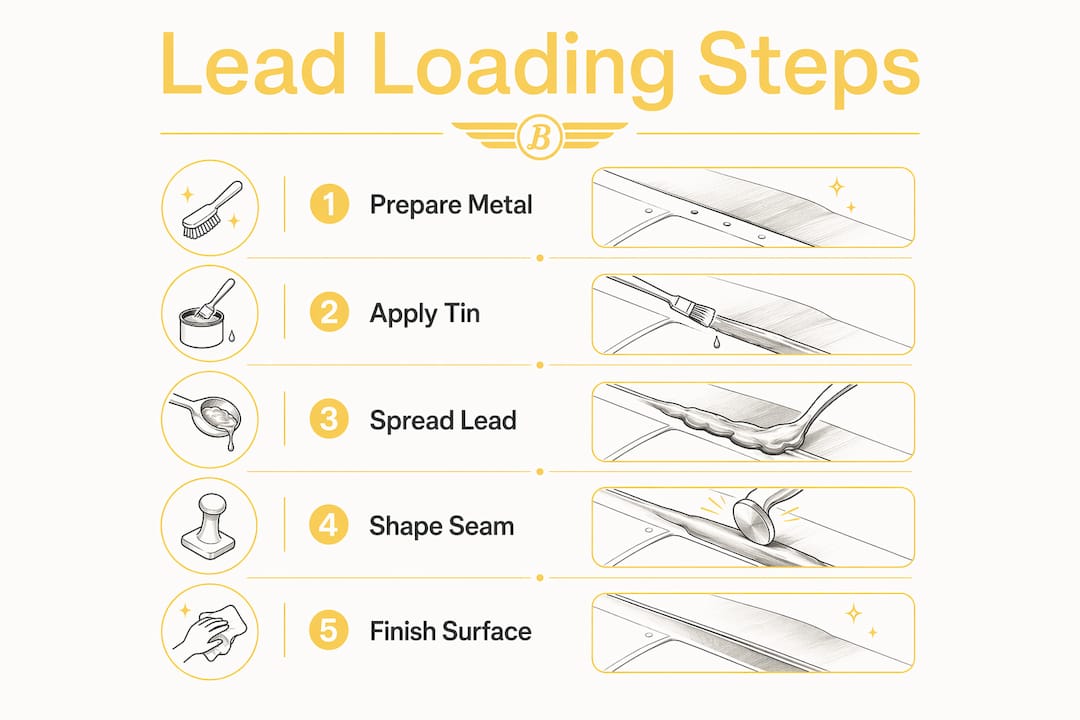
Clean and tin the base metal. Strip the area to bare steel and apply a tinning compound, usually a flux-based paste. Heat the metal with a torch and work the tinning compound in until the surface has a bright, even coat. This step determines whether the lead bonds properly. Skip it or rush it, and the lead will not adhere.
-
Heat the lead-tin solder rod. Use a propane or oxy-acetylene torch to bring the solder to its working temperature near 500°F. The lead should reach a plastic, putty-like state. Precise temperature control is critical. Too cool means no bonding. Too hot means the lead becomes uncontrollably fluid and the bond fails.
-
Apply lead to the panel. Press the softened solder rod against the tinned surface and deposit material in the target area. Work in small sections. Build up slightly more lead than you need, because you will file it down.
-
Shape with a tallow-coated paddle. A tallow-coated paddle acts as both a lubricant and a temperature indicator. When the paddle smokes or turns black, the lead is overheating. Adjust your torch distance immediately and keep the lead in its workable plastic state.
-
File to final shape by hand. Use a body file or Vixen file to bring the lead down to the panel contour. Work slowly and check your progress with a straightedge or your palm. Power tools must never be used on lead surfaces because they release toxic dust and generate heat that destroys the bond.
-
Final finishing. Once the lead is filed flush, finish with fine-grit sandpaper by hand. The surface should blend invisibly into the surrounding metal before any primer goes on.
Pro Tip: Keep a damp rag nearby while working. A quick wipe on the paddle keeps tallow fresh and gives you a reliable temperature read throughout the session.
Safety and health protocols for lead bodywork in 2026
Lead is toxic. That fact does not make lead loading off-limits, but it does make safety protocols non-negotiable. OSHA mandates P100 respirators, gloves, protective clothing, ventilation, and regulated hazardous waste disposal for lead bodywork operations. These rules exist because lead exposure causes neurological and systemic health damage that accumulates over time.
Experienced restorers consider lead exposure manageable for short-term hobbyist projects when safety rules are strictly followed. The key phrase is strictly followed. Cutting corners on a single session can still result in meaningful exposure.
- Respirator: Use a P100 half-face respirator rated for metal fumes. A standard dust mask does not filter lead particles.
- Gloves: Nitrile or heavy-duty rubber gloves. Wash hands thoroughly before eating, drinking, or touching your face.
- Protective clothing: Wear a dedicated shop coat or coveralls. Wash them separately from household laundry.
- Ventilation: Work in a space with active airflow. A fume extractor positioned near the work area pulls lead fumes away from your breathing zone.
- Waste disposal: Lead filings, used rags, and spent solder are classified as hazardous waste. Contact your local waste authority for disposal guidelines. Do not put them in regular trash.
- No eating or drinking in the work area. Lead dust settles on surfaces and transfers easily to hands and food.
The common misconception is that brief exposure is harmless. Lead accumulates in the body. Short sessions with full protection are safe. Repeated sessions without protection are not.
How to maintain and repair lead bodywork on vintage cars
Lead bodywork maintenance starts with knowing what to look for. Existing lead seams on a vintage car can last decades without issues, but age, poor original application, or moisture intrusion can cause problems that need attention.
Identifying damage in lead-filled seams
Run your fingers along seams and body lines. Lead in good condition feels solid and smooth. Cracking, bubbling paint, or soft spots under pressure indicate trouble. A small magnet is your best diagnostic tool. No magnetic pull means lead is present. A strong pull means filler was used at some point, and that area deserves closer inspection for moisture damage.
Performing minor lead touch-up repairs
Minor repairs follow the same process as original application. Strip the damaged area to bare steel, re-tin the surface, and apply fresh lead. The challenge is blending new lead with old without overheating the surrounding area. Work in short heat cycles and let the panel cool between passes.
| Repair scenario | Recommended approach |
|---|---|
| Small crack in existing lead seam | Strip, re-tin, apply fresh lead, file flush |
| Paint bubbling over lead area | Investigate for moisture; strip and re-lead if base metal is sound |
| Large section of failed lead | Assess base metal first; replace panel if rusted through |
| Filler over original lead seam | Remove filler completely, restore lead to factory spec |
| Surface pitting in lead | Light file and re-lead; do not use filler over lead |
When to call a professional
Lead loading requires skill that takes real time to develop. If the damage covers more than a small area, or if the base metal has rust or structural issues, a professional restorer is the right call. Classic car authentication depends on correct materials and methods. A botched amateur repair can affect both value and show eligibility.
Regular inspection twice a year keeps small issues from becoming expensive ones. Pay close attention to roof seams, door pillars, trunk edges, and any area where two panels meet. These are the spots where lead loading was originally applied and where problems first appear.
Key takeaways
Lead loading is the definitive method for finishing seams and joints on vintage cars, delivering metal-to-metal bonds, moisture resistance, and factory-correct results that polyester fillers cannot match.
| Point | Details |
|---|---|
| Lead bonds to steel directly | Metal-to-metal adhesion outlasts polyester filler in high-stress seams and joints. |
| Temperature control is critical | Lead must stay near 500°F in a plastic state; too hot or too cool causes bond failure. |
| Power tools are prohibited | Hand filing only prevents toxic dust release and protects the lead bond. |
| Safety gear is mandatory | P100 respirators, gloves, ventilation, and proper waste disposal are OSHA requirements. |
| Lead raises restoration value | Period-correct lead work is recognized by collectors and judges as a quality standard. |
Why lead work separates good restorations from great ones
I have seen a lot of restored classics come through over the years, and the ones that stop you cold at a show almost always share one thing: the bodywork is invisible. No waves, no shadows, no paint that looks like it is sitting on top of something. That finish comes from lead, not filler.
The mistake I see most often is restorers rushing to lead before the underlying metal is right. Lead is a finishing material. If the panel is not straight and the seam is not tight, lead will not save it. The metalwork has to be done first, and done well. Lead just brings it home.
What surprises people is how much the lead work affects the final paint. A properly leaded seam takes primer and color differently than filler does. The surface is denser and more stable, and that shows up in the depth of the finish. Judges at AACA and Concours d'Elegance events know this. They can spot a filler repair under paint because the surface behavior gives it away.
My honest advice: if you are new to lead loading, practice on scrap panels before touching your project car. The technique takes time to feel natural. The tallow paddle, the torch distance, the filing rhythm. None of it clicks immediately. But once it does, you will not go back to filler for anything that matters. Lead work is what separates a good restoration from one that holds its long-term collection value for decades.
— Tony
Classic cars restored right, smooth as butter
At Butterclassics, we know that the details make the difference between a car that looks restored and one that looks factory. Lead bodywork is one of those details.

Whether you are looking for a classic already restored to the right standard or want to understand what to look for before you buy, Butterclassics has you covered. Browse our current classic inventory to find vehicles where the bodywork tells the right story. If you want the assurance of a verified standard, check out our Butter Certified vehicles for cars that meet our top-notch quality bar. Real lead work, real craftsmanship, real classics.
FAQ
What is lead loading in classic car restoration?
Lead loading is a body finishing technique that uses a 70/30 lead-tin alloy solder to fill and smooth seams, joints, and body lines on vintage cars. It creates a metal-to-metal bond that is more durable and historically accurate than polyester filler.
Why is lead better than body filler on vintage cars?
Lead expands and contracts with steel panels, preventing the cracking and shrinkage that polyester fillers develop over time. Lead is also waterproof, making it far more stable under paint during long-term storage or restoration projects.
How long does lead bodywork take to complete?
A single complex panel section, such as rear pillars or roof seams, can take 7 or more hours to complete correctly. The time reflects the precision required at every step, from tinning to final hand filing.
Is lead bodywork safe for home restorers?
Lead work is manageable for hobbyists when full safety protocols are followed, including P100 respirators, gloves, protective clothing, active ventilation, and proper hazardous waste disposal. Cutting corners on any of these steps creates real health risks.
Does lead bodywork affect a classic car's value?
Yes. Period-correct lead work is a recognized quality indicator among collectors and show judges. Cars with documented lead seams consistently score higher at events like AACA judging and command stronger prices at major collector car auctions.