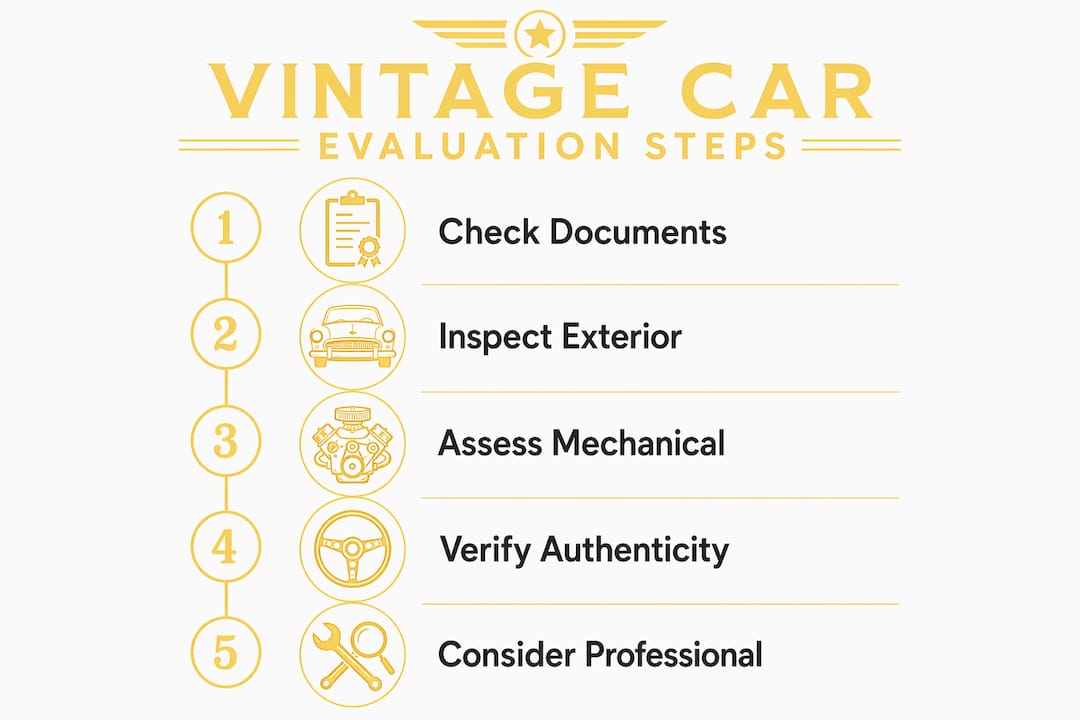
Evaluating vintage car condition is defined as a systematic inspection of a vehicle's documentation, physical integrity, mechanical health, and component authenticity before purchase. The industry standard for rating collector cars is the 1-6 condition grading scale developed by Hagerty and Old Cars Weekly, where Grade 1 represents a perfect show car and Grade 6 is a parts-only vehicle. Skipping this process is how buyers end up with a $40,000 car that needs $25,000 in hidden rust repair. Done right, a thorough pre-purchase evaluation confirms what you're actually buying and gives you real leverage at the negotiating table.
How to evaluate vintage car condition starting with documentation
Before you ever touch the car, the paperwork tells you most of what you need to know. VIN and title searches reveal hidden red flags like salvage, rebuilt, flood damage, or open liens. Use NICB VINCheck and your state DMV to confirm clean title status before you even schedule a viewing. If the title has a brand on it, treat that as a stop sign until you fully understand what happened.
Beyond the title, you want to see the full ownership chain. Registration history, restoration receipts, and service records tell you whether the car has been cared for or flipped repeatedly. A gap of five or more years in documented ownership is worth questioning. Provenance documents, like original window stickers or factory build sheets, add significant value and confirm the car's original specification.
Pro Tip: Run the VIN through the NHTSA recall database before purchase. Open safety recalls on vintage vehicles are more common than buyers expect, and unresolved recalls become your problem the moment you sign the title.
Here is a quick documentation checklist to run through before any in-person visit:
- Clean title with no salvage, flood, or rebuilt brand
- No open liens confirmed via state DMV search
- Continuous ownership history with minimal gaps
- Restoration and service receipts matching claimed work
- Factory build sheet or original window sticker (when available)
- NHTSA VIN recall lookup showing no open recalls
What does the exterior tell you about body condition?
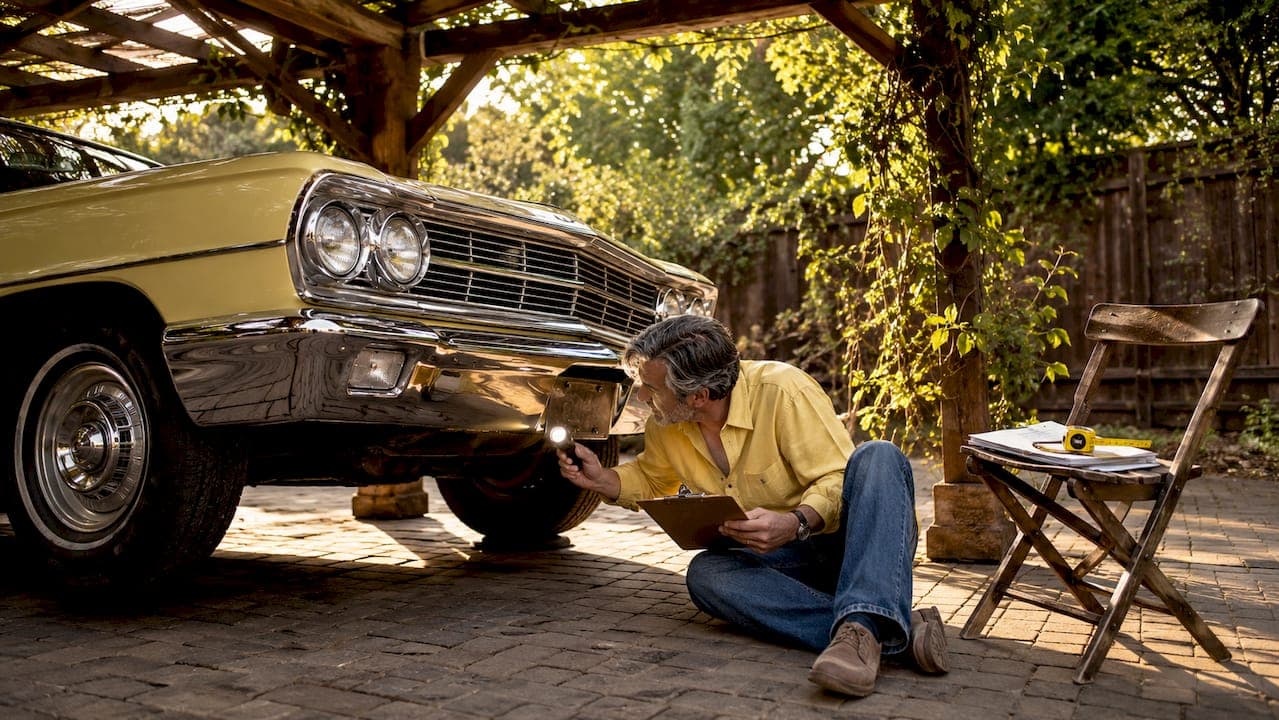
Start your physical vintage car inspection with a slow walk around the entire car. Look at the stance first. A car that sits lower on one corner often signals a bent frame or collapsed suspension component. Then check every panel gap: doors, hood, trunk lid, and fenders. Panel gap inconsistencies and paint surface waviness often reveal hidden collision or cosmetic repairs that sellers don't disclose.
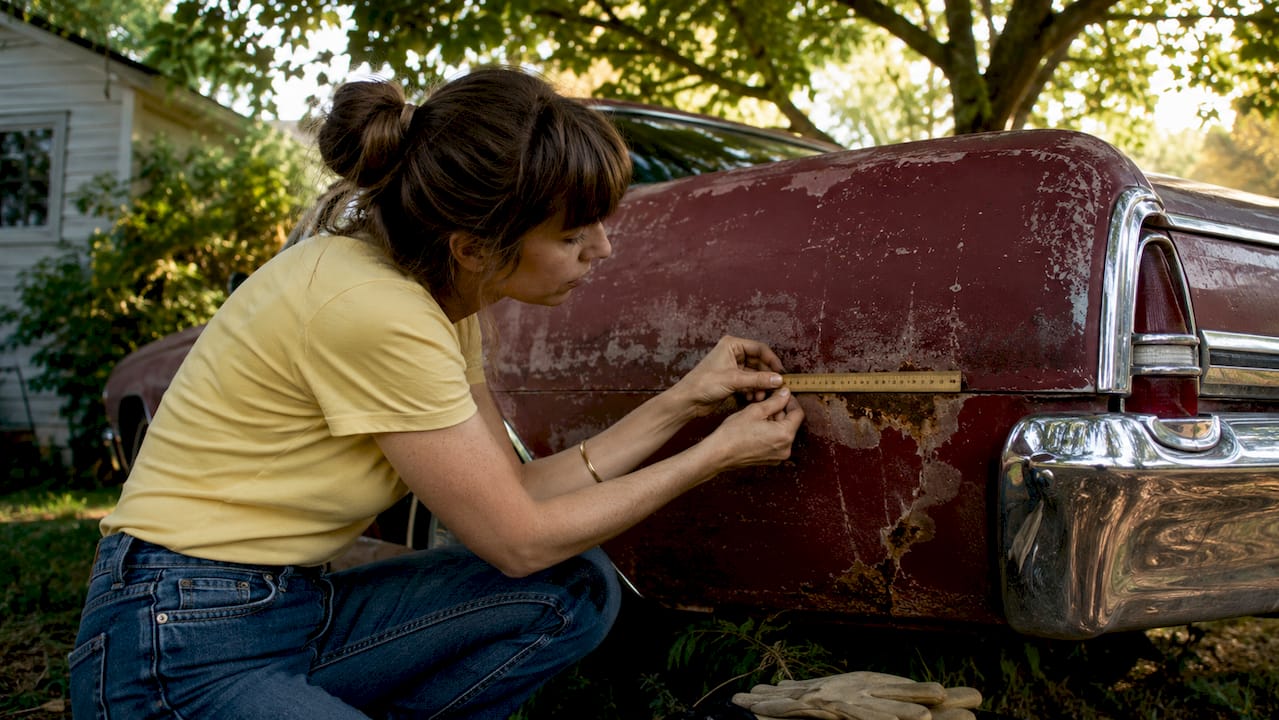
Bring a flashlight and a basic refrigerator magnet to every inspection. A magnet won't stick to body filler, and a skilled body shop can apply up to 3/8 inch of filler under flawless paint that completely hides the rust underneath. Run the magnet slowly along lower door skins, rocker panels, and rear quarter panels. Those are the spots where moisture collects and rust starts first.
Understanding the difference between cosmetic rust and structural rust is critical. Structural rust in seams, overlaps, and supports drastically increases restoration costs because it requires metal fabrication, not just sanding and painting. Surface rust on flat panels is manageable. Rust that has eaten through pinch welds, floor pans, or frame rails is a completely different financial conversation.
Pro Tip: A paint thickness meter takes the guesswork out of spotting repairs. Professional inspections use paint thickness meters and tapping methods to detect hidden repairs not visible to the naked eye. You can buy a basic digital meter for under $50 and use it yourself on any panel you're suspicious about.
Watch for these specific exterior red flags:
- Overspray on rubber trim, glass edges, or door jambs indicating a repaint
- Mismatched paint texture or sheen between adjacent panels
- Bubbling paint along lower body seams (early rust signal)
- Wavy reflections in body panels when viewed at a low angle
- Fresh undercoating sprayed over the floor or frame (a classic rust cover-up)
How to assess mechanical condition during a vintage car evaluation
The mechanical assessment starts before the engine is warm. A cold engine start reveals operational sounds more clearly than a warm start because a warm engine masks ticking and knocking noises that indicate real problems. Ask the seller not to start the car before you arrive. If the car is already warm when you get there, that is worth noting.
Here is a practical sequence for the mechanical check:
- Cold start the engine. Listen for ticking (valve train), knocking (rod bearings), or rattling (timing chain). Any of these on a cold start warrants a compression test before you proceed.
- Watch the exhaust on startup. Blue exhaust smoke signals oil burning from valve or ring wear; white smoke points to coolant leakage and possible head gasket failure. Either color means a significant repair bill.
- Check all fluids. Oil that looks like chocolate milk indicates coolant contamination. Brake fluid that is dark brown has not been serviced in years. Coolant that is rusty orange suggests a neglected cooling system.
- Look under the car. Fresh oil or coolant stains on the ground beneath the engine, transmission, or rear axle tell you exactly where the leaks are.
- Take it for a road test. Listen for clunks over bumps (worn suspension), vibration under braking (warped rotors), and hesitation or stumbling under acceleration (carburetor or ignition issues).
- Test the transmission through every gear. Automatic transmissions should shift smoothly without slipping. Manual gearboxes should engage cleanly without grinding or popping out of gear.
Pro Tip: If the engine passes your basic checks but you still have doubts, request a compression and leak-down test. These two numbers give you a clear picture of internal engine health and are standard requests during any serious classic car appraisal.
What does "numbers matching" actually mean for authenticity?
"Numbers matching" is one of the most misunderstood terms in the collector car world. Numbers matching means components are correct by factory standards via casting numbers, date codes, and assembly stampings. It does not mean every component has an identical serial number. A numbers matching 1969 Camaro Z/28 has an engine, transmission, and rear axle that all carry codes consistent with the factory build timeline for that specific car.
For a deeper look at how authentication works in practice, the classic car authentication guide from Butterclassics breaks down the verification process step by step.
Here is where to look for the key codes:
- Engine block: casting number stamped on the passenger side of the block, plus a partial VIN pad stamp on the front of the block
- Cylinder heads: casting numbers on the ends of each head
- Transmission: casting number on the main case, plus a date code
- Rear axle: casting number on the axle housing, with a date code that must predate the car's assembly date
The date code logic is straightforward. Every component was manufactured before the car was assembled. So a correct engine casting date should fall within a few weeks or months before the vehicle's build date. A date code that falls after the build date means the component is a replacement. That is not automatically a problem, but it does affect value and the "numbers matching" claim significantly.
| Term | What it means |
|---|---|
| Original | Factory component, never replaced, with matching codes |
| Numbers matching | All major components carry codes consistent with factory build specs |
| Period correct | Replacement part from the same era, correct type but not original to this car |
| Restored | Component rebuilt or replaced, may or may not be numbers matching |
Verifying authenticity on vintage cars requires physical inspection of these codes. Factory VIN markings may be limited, so casting numbers and date codes carry the real authentication weight. A seller claiming "numbers matching" without being able to show you the actual codes is a red flag worth pressing on.
When should you hire a professional pre-purchase inspector?
For any vintage car priced above $15,000, a professional pre-purchase inspection is money well spent. Professional inspections cover rust, frame integrity, authenticity, restoration quality, electrical systems, and road tests. They give you an objective report that you can use to negotiate, walk away, or buy with confidence.
When you hire an inspector, request these specific deliverables:
- Paint thickness readings on every panel (with numbers, not just "looks good")
- Compression and leak-down test results
- Undercarriage photos showing frame, floor pans, and suspension mounts
- Electrical system check covering lights, gauges, and ignition
- Authenticity notes on casting numbers and date codes
- Written summary of deferred maintenance and estimated repair costs
Pro Tip: Choose an inspector who specializes in the specific make and model you're buying. A specialist who knows 1960s Ford Mustangs will catch things a general mechanic misses entirely. The dealer inspection checklist from Butterclassics is a solid reference for understanding what a thorough inspection should cover.
Inspection costs typically run between $150 and $500 depending on the inspector's specialty and location. On a $30,000 car, that fee is a rounding error compared to the cost of discovering a rotted frame after purchase. The written report also becomes a negotiating tool. If the inspector finds $4,000 in deferred work, you have documented grounds to adjust your offer accordingly.
Key takeaways
A thorough vintage car evaluation combines documentation checks, physical inspection, mechanical testing, and authenticity verification to protect your investment and confirm what you're actually buying.
| Point | Details |
|---|---|
| Start with documentation | Run VIN through NICB VINCheck and NHTSA before any in-person visit. |
| Use a magnet and flashlight | Detect hidden body filler and rust on lower panels before trusting the paint. |
| Understand structural rust | Rust in seams and frame rails costs far more to fix than surface rust on flat panels. |
| Verify casting numbers | Date codes on engine, transmission, and axle must predate the vehicle's build date. |
| Hire a specialist inspector | For cars over $15,000, a written inspection report pays for itself in negotiating power. |
What photos won't tell you: a buyer's honest reality check
Here is something I've seen trip up buyers more than almost anything else. They fall in love with a car through photos, and by the time they're standing in front of it, their judgment is already compromised. Photos and auction images often conceal rust, leaks, and frame damage, and that is not always intentional on the seller's part. Cameras are genuinely bad at capturing panel waviness, thin paint, and the smell of a leaking rear main seal.
My honest advice: treat every photo gallery as marketing, not documentation. The only evaluation that counts happens in person, with your magnet, your flashlight, and your hands on the car. I have walked away from cars that looked perfect in photos and driven home cars that photographed poorly but were solid underneath. The grading scale guide is worth reading before you go, so you have a mental framework for what Grade 2 versus Grade 3 actually looks like in person.
Patience is the most underrated tool in a buyer's kit. If a seller resists a cold start, won't let you bring a magnet, or pushes back on a professional inspection, that resistance tells you something. Walk away without guilt. The right car at the right price will come around, and it will pass every check you run on it.
— Tony
Find your next classic at Butterclassics
Ready to put these inspection skills to work? Butterclassics makes the search smooth as butter with a curated inventory of classic and vintage vehicles, each presented with detailed specs and high-quality photos.
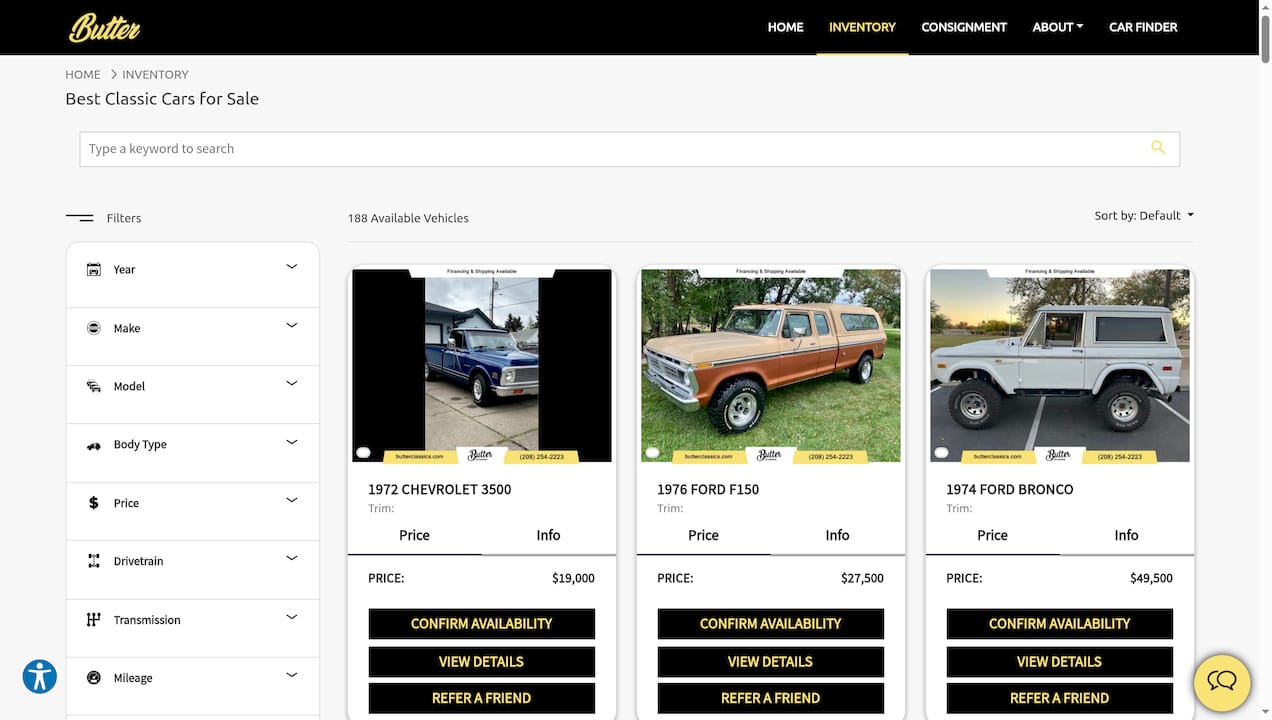
Every Butter Certified vehicle comes with supporting documentation and has been vetted so you can buy with real confidence, not just hope. Whether you're hunting for a muscle car, a classic truck, or a collector-grade Corvette, the full inventory at Butterclassics is the place to start. Browse by price, request a quote, or schedule a test drive directly through the site.
FAQ
What is the standard condition grading scale for vintage cars?
The 1-6 condition grading scale developed by Hagerty and Old Cars Weekly is the collector car industry standard. Grade 1 is a perfect show car; Grade 6 is a parts-only vehicle.
How do I check for hidden rust on a classic car?
Run a refrigerator magnet along lower panels and rocker panels. The magnet won't stick to body filler, which shops use to cover rust. Follow up with a flashlight along seams and pinch welds.
What does numbers matching mean on a vintage car?
Numbers matching means the engine, transmission, and rear axle all carry casting numbers and date codes consistent with the factory build specifications for that specific vehicle. It does not require identical serial numbers on every part.
Should I get a professional inspection before buying a vintage car?
Yes, for any car priced above $15,000. A professional pre-purchase inspection covers rust, frame integrity, authenticity, and mechanical condition, and the written report gives you documented grounds to negotiate the price.
What documents should a vintage car seller provide?
A clean title with no salvage or flood brand, registration history, restoration and service receipts, and ideally a factory build sheet or window sticker. Run the VIN through NICB VINCheck and the NHTSA recall database before you commit.