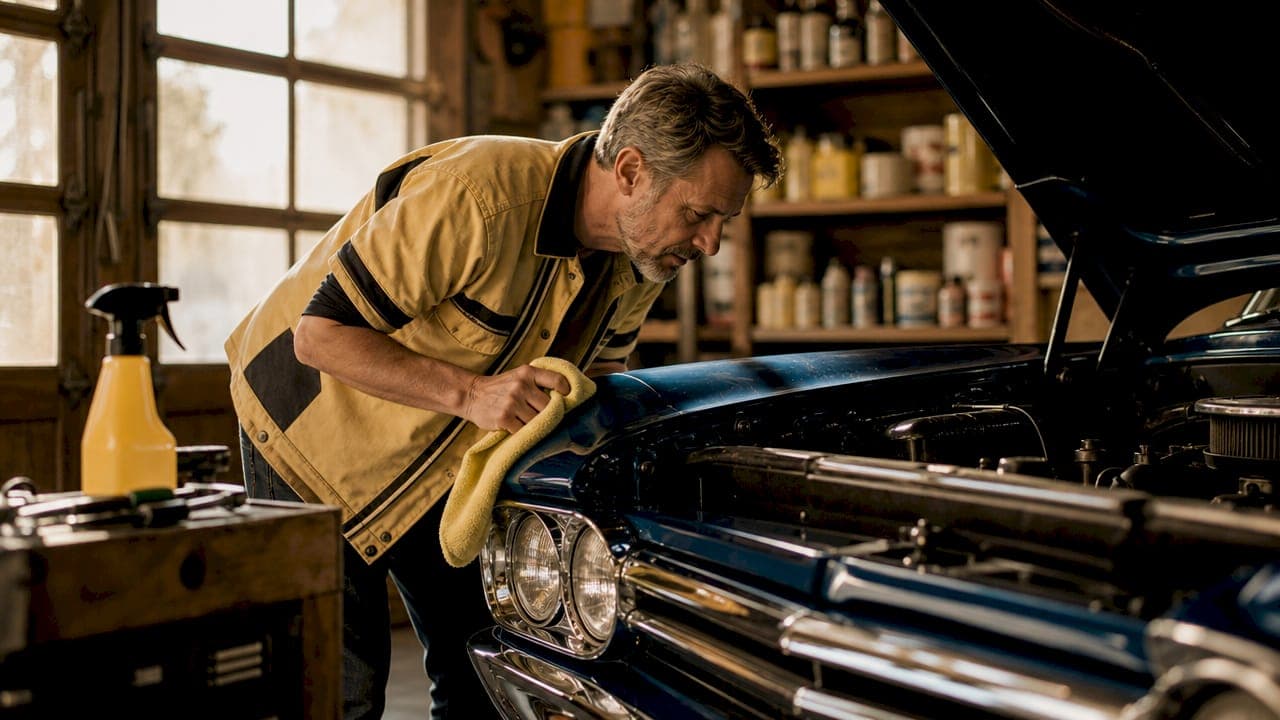
Classic car show preparation is the process of meticulously detailing, inspecting, and organizing your vehicle and related logistics to maximize its appeal at a competitive show. Done right, it separates the cars that turn heads from the ones that blend into the background. Whether you're entering a local Cars and Coffee event or a major judged show like Carlisle or an ISCA competition, the same core principles apply. Start early, work in stages, and never leave anything to the last minute.
What does classic car show preparation actually involve?
Thorough preparation covers every surface, system, and logistical detail of your vehicle and your show-day plan. Most enthusiasts think about washing and waxing, but judging criteria at major shows like Carlisle and ISCA include Body and Paint, Wheels and Tires, Engine Bay, Passenger Compartment, Trunk, and Overall Quality. That means every inch of your car is fair game. Preparation also includes how you transport the vehicle, what you pack for show day, and how you present yourself and your car to visitors and judges.
The industry term for this full process is "show detailing," and it goes well beyond a standard wash. Show detailing combines paint correction, surface protection, mechanical inspection, and display planning into a single coordinated effort. Understanding that scope upfront is what separates a polished result from a rushed one.
How to detail your paint and bodywork before a show
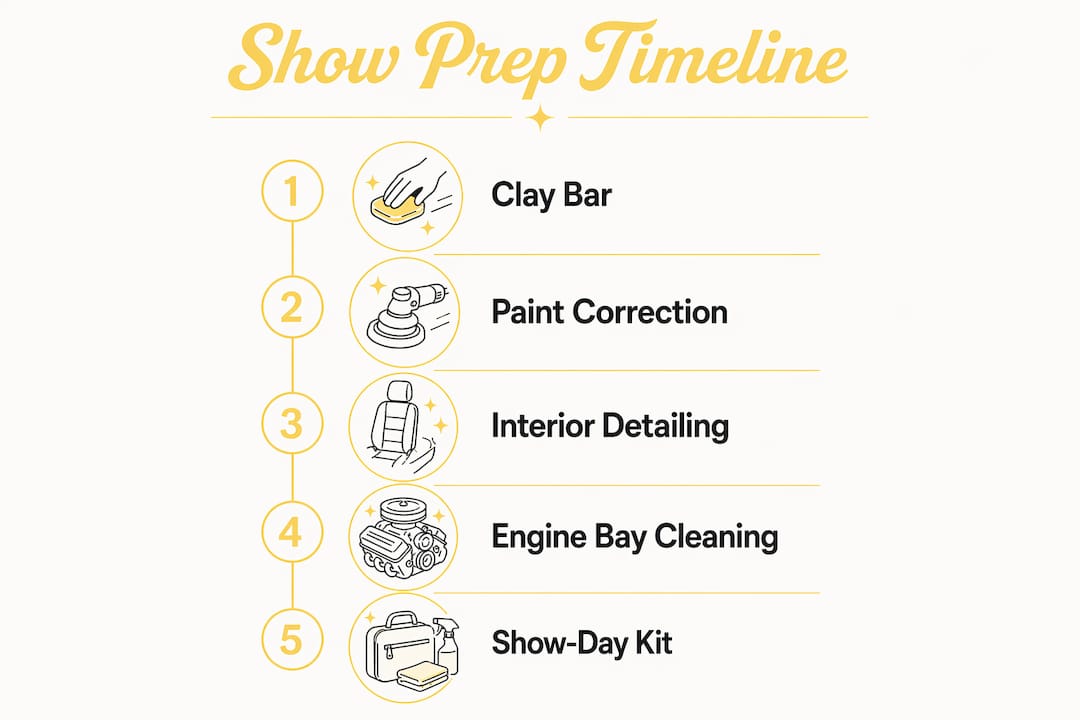
Paint correction is the foundation of any serious show prep. Heavy paint correction and interior stain treatment should happen 1–2 weeks before the show to allow proper curing. That timeline gives your wax or sealant time to bond fully and prevents the soft, hazy finish that shows up when you rush the process.
Here is the sequence that works:
- Wash thoroughly with a pH-neutral car shampoo and a clean microfiber wash mitt. Two-bucket method only. One bucket for soapy water, one for rinsing the mitt.
- Clay bar treatment removes embedded contaminants that washing misses. Run a clay bar across every painted panel before you polish. The paint should feel glass-smooth afterward.
- Paint correction uses a dual-action polisher with a cutting compound to remove swirl marks, light scratches, and oxidation. Work one panel at a time.
- Polish with a finishing polish to refine the surface and add gloss.
- Protect with a carnauba wax or paint sealant. Carnauba gives a warm, deep shine that judges and visitors notice immediately.
DIY detailing materials cost $120–$200, while professional shops charge $300 or more for comparable paint correction. That price gap means most enthusiasts can achieve show-quality results at home with the right tools and patience.
Pro Tip: Never wash your car the morning of the show. Rushed washing causes swirl marks from dirty mitts and leaves water spots in panel gaps. Do your final wash two days before and use a quick-detailer spray on show day instead.
| Stage | Tool | Timing |
|---|---|---|
| Clay bar treatment | Clay bar and lubricant spray | 2 weeks before |
| Paint correction | Dual-action polisher, cutting compound | 1–2 weeks before |
| Polish and wax | Finishing polish, carnauba wax | 1 week before |
| Final touch-up | Quick-detailer spray, microfiber towels | Show day |
Rushing final show prep leads to swirl marks and overlooked mechanical issues. Those mistakes hurt your score more than minor cosmetic flaws that were present before you started.
How do you prepare the interior, engine bay, and tires?
The interior, engine bay, and tires each require their own approach. Judges walk around and through your car, so no area gets a pass.
Interior detailing steps:
- Vacuum every surface including under the seats, in door pockets, and in the trunk
- Wipe down the dashboard, door panels, and center console with an appropriate interior cleaner
- Clean carpets and floor mats with a fabric cleaner or carpet shampoo
- Treat leather seats with a conditioner to restore suppleness and prevent cracking
- Remove all personal items, air fresheners, and anything that breaks the period-correct look
Engine bay:
Engine bay cleanliness can differentiate between high and average scores. The right method starts with dry brushing loose dirt and debris before applying any degreaser. Skipping that step turns dry dust into sludge that clogs tight spaces and stains hoses. After dry brushing, apply a water-based degreaser, let it dwell for a few minutes, and rinse carefully with low pressure. Avoid soaking electrical connectors or the alternator. Finish by dressing rubber hoses and plastic covers with a matte protectant.
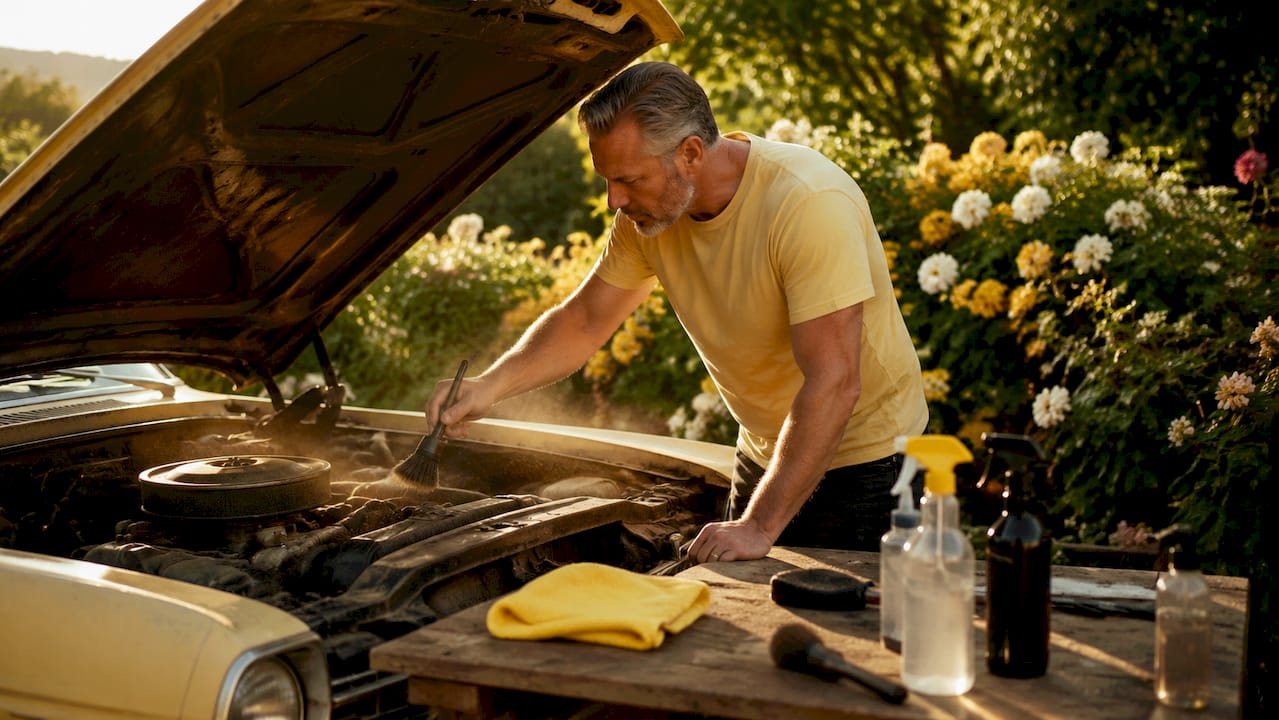
Pro Tip: Clean the engine bay at least five days before the show. That gives everything time to dry fully and lets you spot any fluid leaks that might reappear before judging.
Tires and wheels:
Clean wheels with an iron fallout remover first. Iron deposits from brake dust are invisible until they cause long-term damage, and they dull the finish. Follow with a wheel cleaner suited to your wheel type, whether that is painted, chrome, or polished aluminum. Apply a tire dressing the evening before the show and let it cure overnight. A fresh, even coat of tire dressing signals attention to detail that judges and visitors both notice.
What should you pack and plan for show day logistics?
Show day logistics are where well-prepared enthusiasts separate themselves from the rest. The biggest decision is transport. Driving your classic to the show exposes it to road grime, bug splatter, and stone chips. Trailering is the safer choice for freshly corrected paint. If you need guidance on safe transport options, the logistics involved are worth understanding before show season starts.
Your show-day kit should include:
- Microfiber towels (at least six, clean and dry)
- Quick-detailer spray for dust removal without scratching
- Glass cleaner for windows and mirrors
- Tire dressing for a final touch-up after unloading
- Bug and tar remover for any road debris picked up in transit
- A soft detailing brush for vents and trim gaps
- Wheel wipes for brake dust that settles during the drive or trailer ride
A show-day kit enables 20–30 minutes of dust and bug touch-ups on arrival and throughout the event. That window is enough to get your car looking its best before judging begins.
Arrive early. Early arrival gives you time to choose your spot, position the wheels correctly, and do a full walk-around inspection before crowds gather. Arriving with a full fuel tank prevents morning delays and stops you from picking up windshield grime at a gas station on the way. It sounds minor, but those small details add up.
What are the best practices for displaying your car at a show?
Your display strategy affects how visitors and judges experience your car. Positioning matters more than most first-time exhibitors realize. Park with the most visually striking angle facing the main walkway. Turn the front wheels slightly outward to show off the wheel faces and brake hardware. Pop the hood to display the engine bay, and open the doors if the interior is a strong point.
Display boards with the model, year, engine specs, and modifications significantly increase visitor interaction and appreciation. A well-made display board tells your car's story when you are busy talking to someone else. Include the build history, any restoration work, and notable features. Keep the text readable from three feet away.
"Show etiquette and preparation are equally important. Respectful behavior enhances the overall experience for everyone at the event." — Car Show Etiquette, RealTruck
Experienced show etiquette prioritizes the "Look, Don't Touch" rule. Post a polite sign near your car reminding visitors not to touch the paint. Be approachable and ready to share your car's history. Judges and visitors respond well to owners who know their vehicle inside and out. Your enthusiasm for the build is part of the display.
Understanding how your car is graded helps you prioritize your prep. The classic car grading scales used by collectors and judges share common criteria, and knowing them before you start detailing tells you exactly where to focus your effort.
Key takeaways
Thorough classic car show preparation requires a multi-week plan covering paint correction, interior detailing, engine bay cleaning, smart logistics, and a clear display strategy.
| Point | Details |
|---|---|
| Start 1–2 weeks early | Heavy paint correction and stain treatments need time to cure before show day. |
| Pack a show-day kit | Microfibers, quick-detailer, and tire dressing handle dust and transit grime on arrival. |
| Clean the engine bay in stages | Dry brush before degreasing to prevent sludge and protect electrical components. |
| Use a display board | Boards with specs and build history increase visitor engagement and judge appreciation. |
| Follow show etiquette | Post a "Look, Don't Touch" sign and be ready to share your car's story with visitors. |
What I've learned from years of show prep
The biggest mistake I see at shows is not a dirty car. It is a car that was clearly rushed in the final 48 hours. You can spot it immediately: swirl marks under the show lights, water spots in the door jambs, and a tire dressing that was applied wet and flung onto the fender. All of that is avoidable with a simple calendar and a little discipline.
What actually works is treating prep like a project with phases. I block out the first weekend for paint correction, the second for interior and engine bay work, and the week before the show for final protection and logistics. That rhythm keeps the work manageable and the results consistent.
The social side of shows is just as rewarding as the competition. When your car is genuinely ready, you spend the day talking to people who love what you love instead of stressing about what you missed. That shift in experience is the real payoff of doing the work right. If you are thinking about which vehicle to bring to your next show, understanding vintage car condition before you commit to a build saves a lot of time and money.
— Tony
Butterclassics has your next show car waiting
Ready to find a classic worth all that prep work? Butterclassics carries a hand-selected inventory of classic and vintage vehicles, from muscle cars and Corvettes to Broncos and vintage trucks, each listed with detailed specs and high-quality photos.
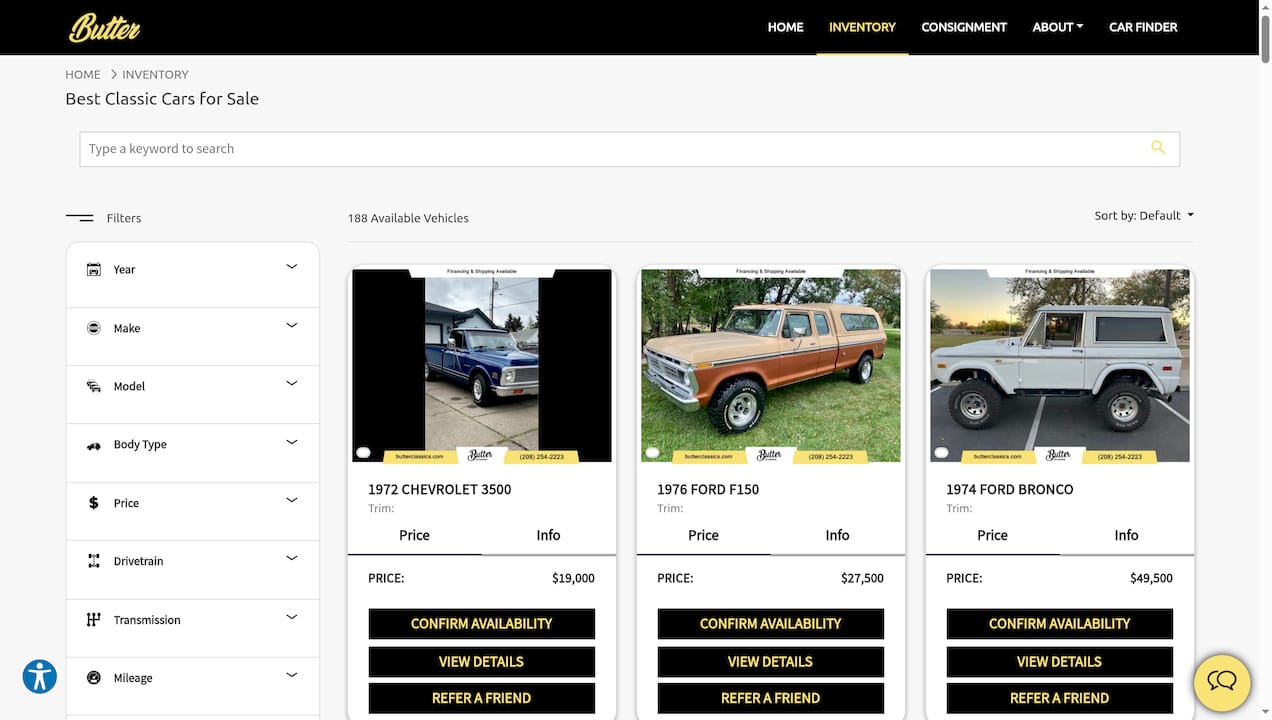
Butterclassics also offers Butter Certified vehicles that have been inspected for quality, giving you a strong starting point for show-level preparation. If you are looking for your next show project or a proven collector car, browse the full inventory and find the one that speaks to you. Financing pre-qualification and consignment services are available, so getting behind the wheel of your next show car is smooth as butter.
FAQ
How far in advance should I start show prep?
Start paint correction and heavy detailing 1–2 weeks before the show to allow proper curing. Final touch-ups and logistics should be handled the day before.
What is the most important area judges evaluate?
Major judged shows score Body and Paint, Wheels and Tires, Engine Bay, Passenger Compartment, Trunk, and Overall Quality. Paint and engine bay cleanliness carry the most visual weight.
Should I drive or trailer my classic to the show?
Trailering is the safer choice after fresh paint correction. Driving exposes the car to road grime, bug splatter, and stone chips that undo hours of prep work.
What goes in a show-day kit?
Pack microfiber towels, quick-detailer spray, glass cleaner, tire dressing, bug remover, and a soft detailing brush. That kit covers most touch-up needs in 20–30 minutes on arrival.
Do display boards really make a difference at shows?
Display boards with the model, year, engine specs, and modification history significantly increase visitor interaction. They tell your car's story when you are not standing next to it.